|
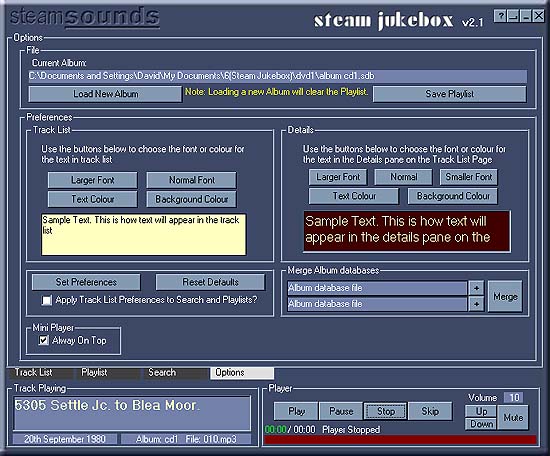
On the options page you can load new albums,
change the appearance of some parts of steam jukebox and merge album
databases together.
File
Here you can load a new album.
Click the Load New Album button. Album files (with the extension .sdb
- Steam Jukebox Database) may be found on your
hard disk, or more usually on a CD or DVD.
If none are visible you will have to navigate to the appropriate location
to find one.
When you have found the one you want select it and press Open.
When you load a new album any recordings in a playlist will probably
be no longer available so the playlist is cleared. If you have an unsaved
playlist that you want to keep you should save it before loading a new
album.
Back to top
Preferences
So, you don't like the way Steam Jukebox looks? Well, this is where
you can change a few things.
If the text is too small, or you don't like the colour you can change
both the track list and the details.
Any changes will be saved and used the next time you use Steam Jukebox.
You can apply changes by clicking the Set Preferences button or, if
things go wrong, you get white text on a white background for example,
go back to the default appearance by clicking Reset Defaults.
Back to top
Merge
Album Databases
This can be very useful!
If you have sufficient space available you can copy albums from CD or
DVD onto your hard disk. You may find that recordings play more reliably
from the hard disk but the main advantage is that you can have more
recordings available at the same time without having to swop disks.
Instructions for what to copy will be found on this
page.
To get all the recordings available you need to merge the album databases
together.
Click the + button next to the top box. In the dialogue that appears
find the first album that you want to merge then click OK. Then click
the other + button and select the next album. It is important to merge
the albums in the correct order otherwise 1990 recordings may appear
before 1980 ones!
When you have the first two albums selected click the Merge button and
in the dialogue that appears find the folder that you created earlier,
give the new album a new name, perhaps 'all albums', and click Ok. That's
the first two done.
Click on the first + button again. This time select the merged file
you just created. Next click the second + button and select the next
album then click the Merge button and save the merged file with the
same name that you used before, 'all albums'.
From here until you have all the albums that you want merged you only
need to change the album in the second box. After each one save the
merged file with the same name.
It's easy to get confused while doing this so write out what you plan
to do beforehand!
When you have finished you will be able to load the new album and have
all the recordings available in the Track List.
Mini-Player
If you check this box the Mini-Player will stay on-top of other windows.
Back to top
When
Playing Random or All tracks
If you use the All or Random buttons in the main track list you can
use these option buttons to limit the tracks to either lineside or on-train.
Back to top
Window
controls
See the Track List page for information about
this area.
Back to top
The
Player
See the Track List page for information about
this area.
Back to top
|